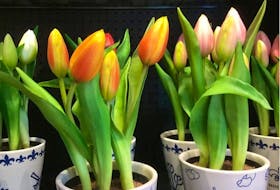
Every summer, I buy hanging baskets for the hooks on our front porch. I usually get yellow flowers because they’re my favourite, but I’ll do pink or purple sometimes — and yes, I refer to most flowers by colour because I can’t identify any varieties except roses, daisies and sunflowers. This is admittedly embarrassing for a woman who is named after a literal flower.
Every summer, the hanging baskets wither and die. No amount of watering seemed to keep them around for very long. We also live on top of a very windy hill, and I learned last summer that wind dries out plants as badly as not watering them.
As you may have guessed, I have a black thumb. I want hanging baskets because they’re pretty, but I have zero interest in making an effort to keep flowers alive. I’m just not a gardener, and I’m OK with that. (I’d rather be a decent cook, but I don’t think I’m ever going to be that, either.)
This summer, I thought I’d try something new. Instead of shelling out $40-ish on two hanging baskets that would soon kick the bucket (their literal plastic basket), what if I made more permanent options?
I started with the plants themselves. Artificial flowers are not cheap! I browsed many options on Amazon and eventually found a 12-pack of artificial leafy vines, each vine measuring about 2m. They were well-rated and each 12-pack was only about $13, so I ordered three.
They had a bit of a plastic smell when they arrived, so I left them on the porch to de-stink for a while while I brainstormed what to do for baskets.
I could have bought plastic hanging baskets, but decided wood would be a nicer option — especially since I didn’t have to worry about water or drainage. I sketched out the idea of tiered wooden planters made from wooden squares, using a mixture of 1x3s and 1x4s that I had in my studio.
Here’s a cut list for one (1) hanging basket if you’re going to make your own:
- Bottom tier of the basket: Two (2) 8-inch 1x3s and two (2) 6 1/2-inch 1x3s
- Middle tier of the basket: Two (2) 9 1/2-inch 1x3s and two (2) 8-inch 1x3s
- Top tier of the basket: Two (2) 11-inch 1x4s and two (2) 9 1/2-inch 1x4s
You’ll notice that although I’m building squares, all four sides aren’t equal. That’s because you have to account for the thickness of the boards, so two of the sides need to be shorter because they’ll be sandwiched in between the other boards.
I used my cordless finish nailer to quickly assemble the tiers (one top, one middle, one bottom for each basket) and then I had to make them stack up. I nailed scrap blocks of wood into the inside edges of the bottom and middle tiers, which allowed the squares to stack on top of each other. Then I secured the layers together with wood glue.
At this point, I had two tiered wooden baskets — but they didn’t have bottoms and there was no way to hang them.
I cut a few crosspieces of 1x2 measuring 6 1/2-inch long — exactly the right length to fit inside the small tier — and nailed them across the inside of the bottom. Then, when people looked up at the baskets, they wouldn’t be able to see straight through to the top of them.
I knew the hanging baskets couldn’t actually hang from rope or twine, since they were pretty heavy and would thud around in the wind, so I screwed a 20-inch 2x2 post straight through the middle of each basket into one of the bottom cross pieces. They looked really weird by this point — like upside-down wooden lollipops.
I also cut a couple more crosspieces — these ones were 9 1/2-inch long, to fit inside the top tier — and nailed them into the top on either side of the 20-inch posts. This, I figured, would give me something to wrap the vines around and give the appearance that the baskets were full of real plants.
I painted the baskets black (Fusion Mineral Paint’s Coal Black) and then started loading them up with vines. I basically knotted each one around a crosspiece or the hanging post so it wouldn’t blow away, and then tangled them all together — fluffing and trimming as necessary — until I felt they looked finished. I only ended up using two of the vine packages, so I have the third left to make another basket.
To make the baskets appeared like they were hanging, rather than suspended from the 2x2 stuck through their centres, I staple-gunned on lengths of twine — connecting the four corners to the top of the hanging post. (You can barely see this when they’re hanging, though, so feel free to skip that step entirely.)
I held each basket in place while my handy husband helped me hang them. I held the top of the 2x2 post up against the metal hook while he held a scrap block of wood on the other side of the hook and screwed them together — locking the basket in place over the hook, so it baskets won’t drift in the wind.
I’m pleased to report that both hanging baskets look great, and the plants are holding up remarkably well. The vines flutter in the wind very naturally, but have yet to untie or blow off. I plan to buy some colourful artificial flowers to add in occasionally — probably by tying them to the centre post — but I like that the basic baskets are just neutral greenery.
When I’m ready to take the baskets down for winter, we’ll just remove the screws holding them in place and bring them back inside. Who knows, though? Maybe I’ll add artificial holly and mistletoe and they can stay up year-round — but I suppose the neighbours would be onto my sneaky little secret then!
- COST: $30 each ($16 per basket, $14 for each set of greenery)
- EFFORT: 1 out of 5
- RESULTS: 5 out of 5
Heather Laura Clarke is a crafty maker who perpetually has paint smears on her hands, sawdust in her shoes and bits of thread stuck to her leggings. She lives in Truro with her husband, son, and daughter. Follow her adventures at HeathersHandmadeLife.com.